On to the holoprojectors. For those of you who do not know what a holoprojector is, this is the holoprojector.

There are actually three of them mounted in the dome. Front, top and one on the back.

It is most famously used of course, to project the hologram of Princess Leia.
I think this is one of the few “real world” parts that was used to make him originally. They were the reading lamps out of an old Vickers Viscount airline that flew in England.
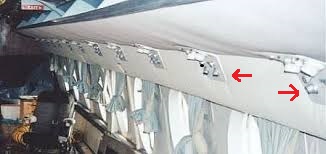
You can see them mounted in the aircraft here. There were about 70 of them per airplane.

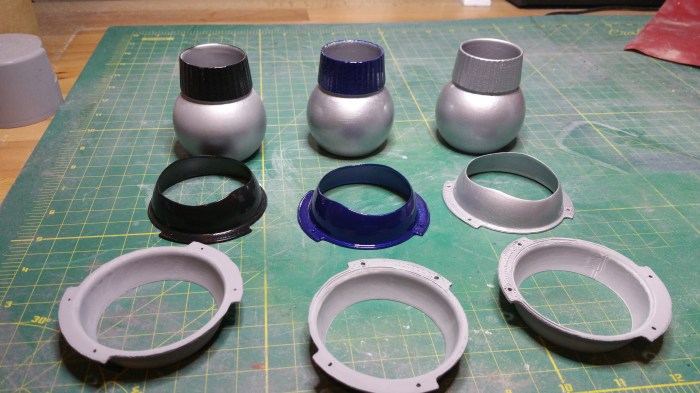
This is what they looked like “uninstalled”.

Broken down into three, 3D printed parts, you can see how the “lamp” will be able to move around while being clamped inside the two cups. Which can then be attached to the inside of the dome.
Since these are more 3d printed parts I had the same issues that I had with the radar eye. Print lines. But I did not want to use the same solution that I used earlier. There were a couple of reasons. One, I didn’t think it would have been that easy to get a even coat around all the curves. Second I didn’t want to lose the detail of the lines on the “lamp shade” portion of the piece. I knew that I was going to lose a lot with the paint and didn’t want to compound the issue.

So this was my dilemma, I wanted to keep the detail of the vertical decorative lines on the lamp but want to take out all the horizontal print lines on the ball. So I looked on the Astromech message board and found a post from the guy that sells the 3d printed parts. In that post he suggested using this:

Filler Primer. It is a primer that is a little bit thicker than normal primer so it will fill in tiny gaps. So I decided to try this way.

First coat, not much difference that I can tell. But it did get better after a couple of coats and a little bit of sanding between coats. Unfortunately, I don’t have any pictures of any of those. I don’t know why I didn’t take any, brain fart.
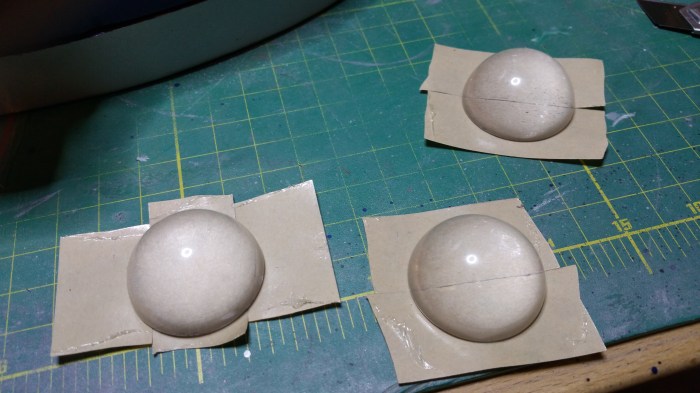
Since these will be moving parts I want not only the ball to be as smooth as possible but also the cups that it will sit in as well. Since there is no detail I need to preserve on those I was able to just sand them smooth.

Before sanding.
Inside cup. No part of this will be seen.
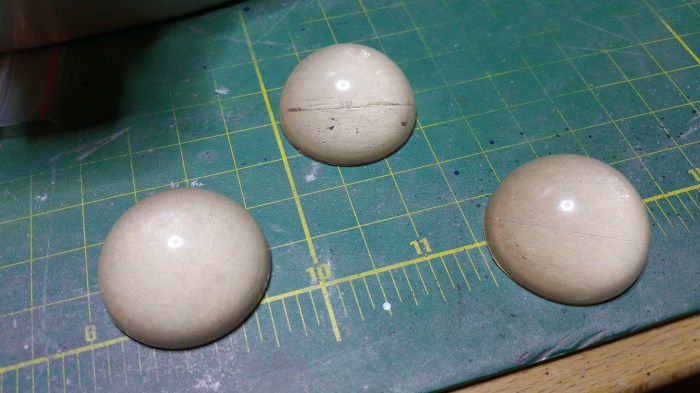
After Sanding

Before sanding
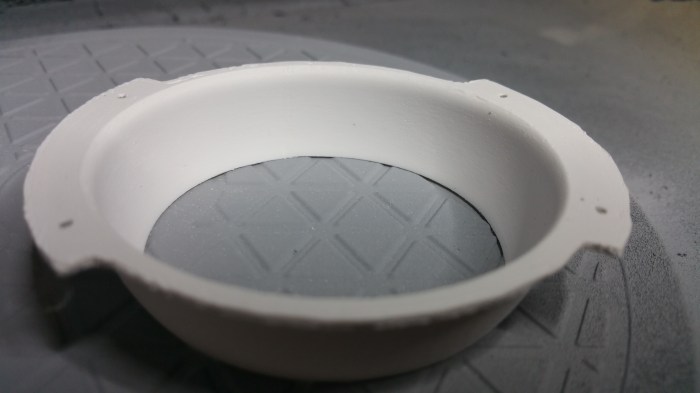
Cowl. The upper part of this piece will be seen.

After sanding
Before sanding

Inside of cowl

After Sanding.
Now I came to an interesting decision. What color do I want to paint them? This is one of the few parts that you have a bit of a choice in paint color. In every movie except for Episode IV all parts of the holoprojectors were grey/aluminum in color. In Episode IV however they were not. And not only were they different colors from the other episodes, from scene to scene they may be different colors as well.

This is a Promo shot for Episode VII you can see that the front and and just a bit of the top HP’s are grey/silver. This is the color for all the movies except IV.

Episode IV you can see that his Front HP is black on both the cowl and “lamp shade” and the lamp shade on the top HP looks blueish.

Here the Front is black again but the top cowl and shade are both silver.

Here it looks like the front is still black but the top cowl is blue, with a black shade, and it looks like the back lamp shade is black as well.
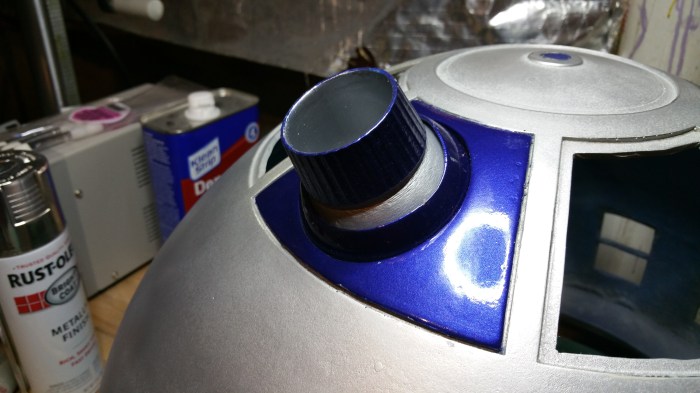
So I had some options. I decided to make the front HP black, the top Blue and the back Silver.
First I laid down the base color of silver
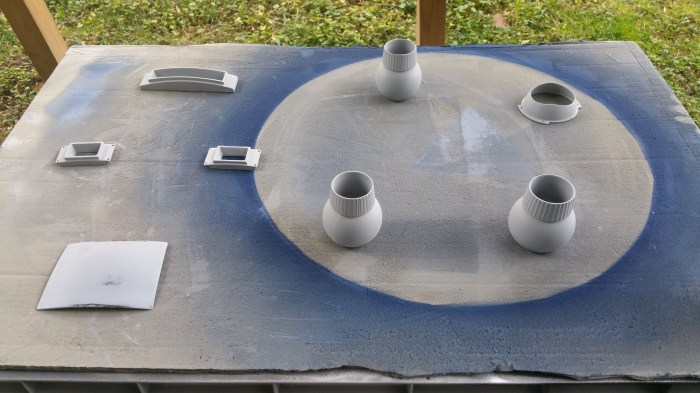
Thanks to an unusually warm December I was able to paint a bunch of parts that I needed to paint silver all at once. The parts in the top left hand of the picture are the front and rear logic display bezels. and the lower left hand corner piece is a dome panel that I had originally painted blue but later found out it is actually silver.
This is after about three coats of silver. I am about to start putting a top coats over the pieces. The dome panel does not need a top coat so it will mach the dome coloring. I also masked over the shades that I will be painting black and blue.

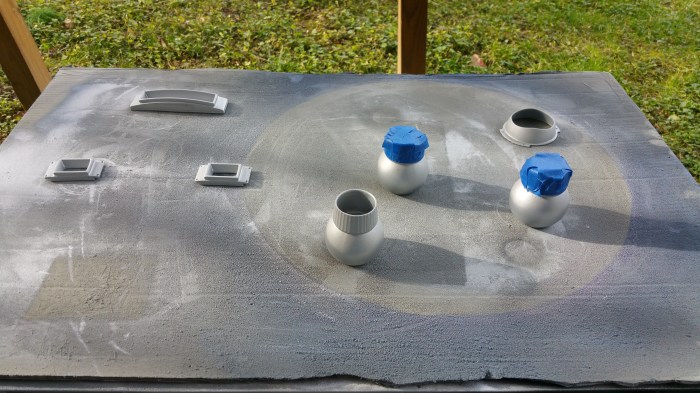
Masking off the ball part of the HP so that I can paint the top. you can also now see I was able to get the ball part pretty smooth. I’m not thrilled at this point with how shade turned out. You can still see a lot of the print lines. I am also hoping at this point, that the paint will help cover some of those up.

Paint the blue parts. The insides of the shades don’t actually get painted the different color. It remains the silver color. So I tried stuffing a paper towel inside to cover it up.
All done with the paint. Although at this point I still needed to touch up around the rim of the shade. The paper towel trick didn’t work quite as well as I had hoped. On to mounting them into the dome.

The first thing I needed to do is mount this pie panel onto the dome.

I had to glue it down. The glue takes 24 hours to set. This is that pie panel clamped down with a rag to cover it up so the clamps don’t damage the paint.

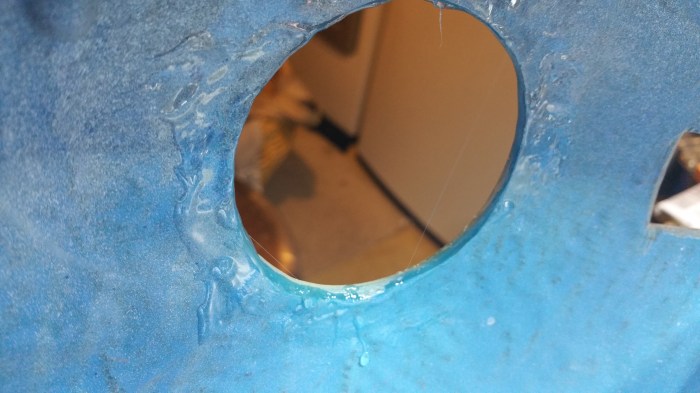
The clamps didn’t damage it, but when I went to dry fit the holoprojector, the hole was a bit too small, and I needed to dremmel it out some more. Unfortunately that damaged the paint around the hole. I do not remember how the right edge got damaged.
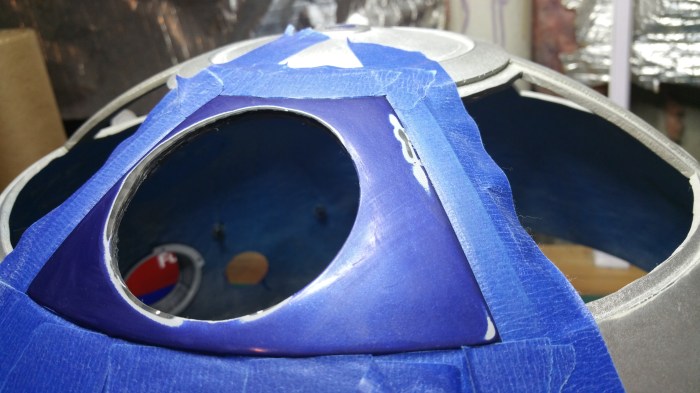
More sanding.

I got tired of sanding so I used some acetone and the paint came off pretty easily.

3 coats of blue 3 coats of top coat and 3 days later. Like it never happened.
Applying glue to the inside of the dome

I only had room to put on one clamp, so I had to improvise with spray bottle that is filled with water to apply pressure to the other side.

It takes this glue 24 hours to cure completely. One down two more to go.

I had to get a little bit more creative for the top cowl. First I had to elevate it. I used a spray paint lid, works perfectly.

I didn’t want to use clamps because, even though I used a rag the last time it still left some small marks on the original paint. I am using a almost full can of acetone to hold the dome down on to the spray paint lid to counter balance the water spray bottle I am using to hold the actual cowl in place.


We were leaving for Nebraska, for Christmas, the next day and I was trying to think of a way that I could do both top and back cowls at the same time. This way i wouldn’t “waste” a day after I came back waiting for the glue to cure on the back. I then noticed that the water spray bottle was the exact size that I needed. I was able to do both at the same time.

Done and done.
My next issue was how do I join the cowl to the inner cup. I didn’t necessarily want to use glue. For one, any excess glue would obviously “ooze” out from between the pieces when I clamp them down. I could clean off the excess, but i took a lot of time to make sure the inside was as smooth as possible. I didn’t want to take the chance that there would be some glue residue left over, even after cleaning. Second, I would have no way to clamp the two pieces together for a day while the glue dried. This is because I realized, at this point, that I probably assembled the holoprojectors in the wrong order. I should have put all three pieces together, and then, glue the completed part into to the dome.
While researching another part of the dome. I came across a post by a person who was using double-sided tape to attach a hinge part to a dome panel.
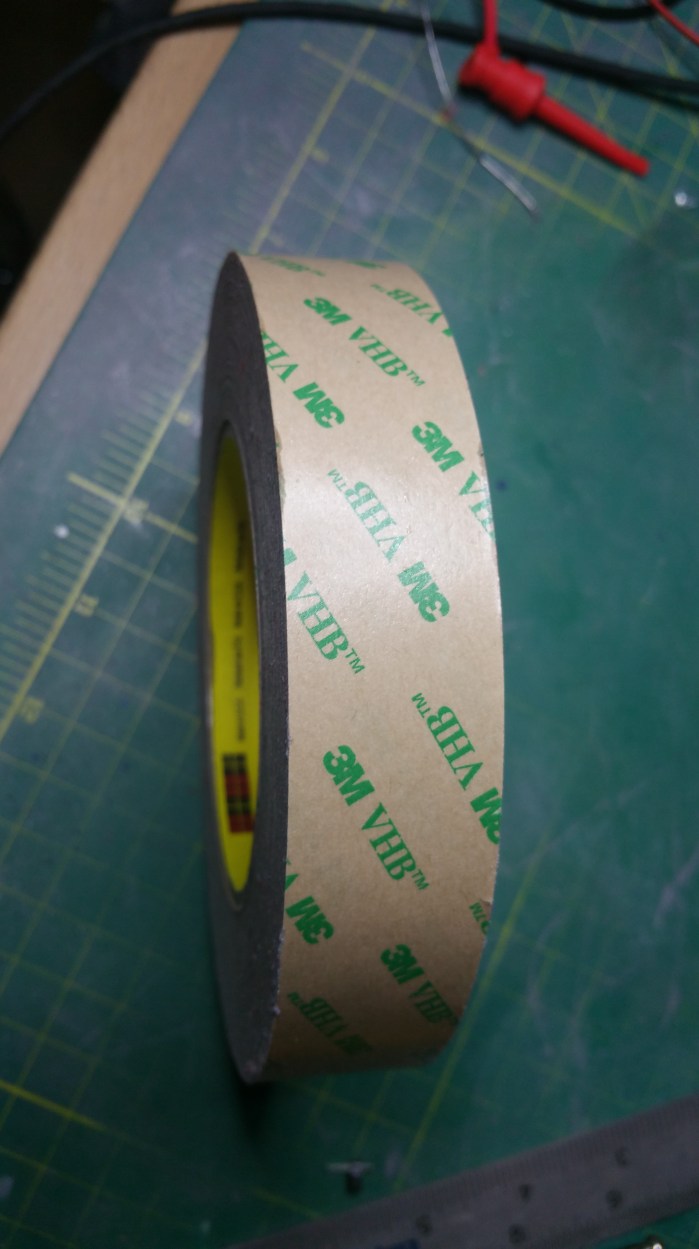
Specifically, this tape. This is 3M VHB tape (Very High Bond). It is basically industrial strength two sided tape. This type of tape is what they use to bond the glass for high rise buildings to their frames. It also solves my biggest issues that I was having. I can custom cut it, so there will be no adhesive in the cup area, and it cures with more pressure applied, not over time, so I don’t need to find a way to clamp it overnight. I had actually considered using it to mount the cowl to the inside of the dome, but the tape works best when sandwiched between to flat surfaces, which the inside of the done is not.

Just apply to the part.
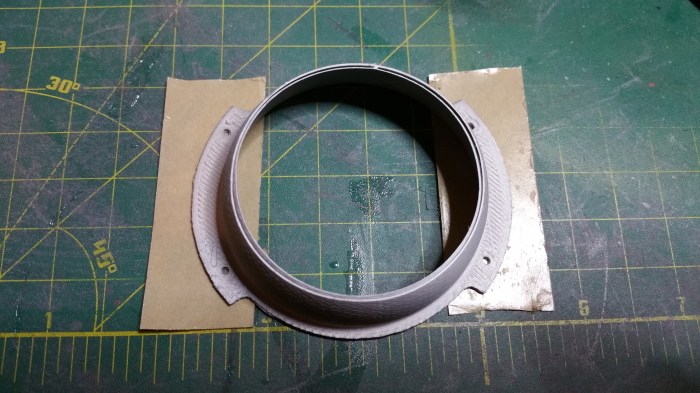
Apply a lot of pressure to wherever the part touches tape. Use an Exacto/box knife to carefully cut around the edges.

Peel off the backing and voila you are ready to go. I didn’t put tape all around the edge because there might be a time in the future where I might have to disassemble it and I thought it would be easier to do that if the whole thing wasn’t “glued” down.

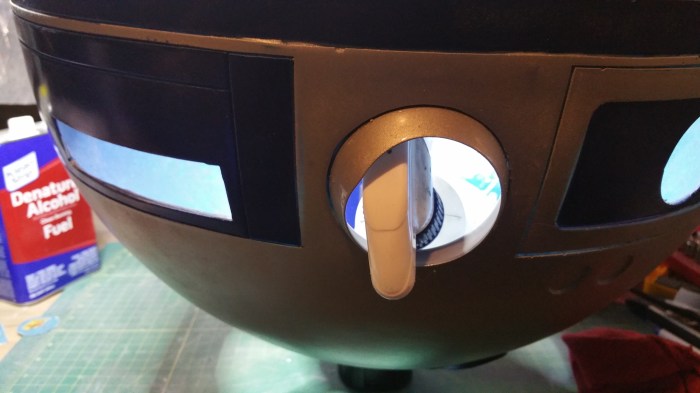
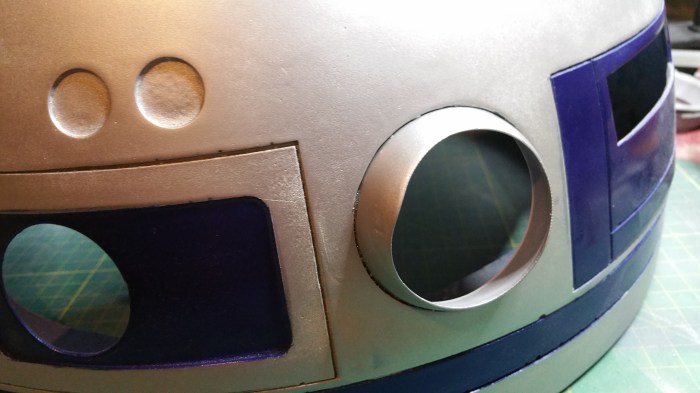
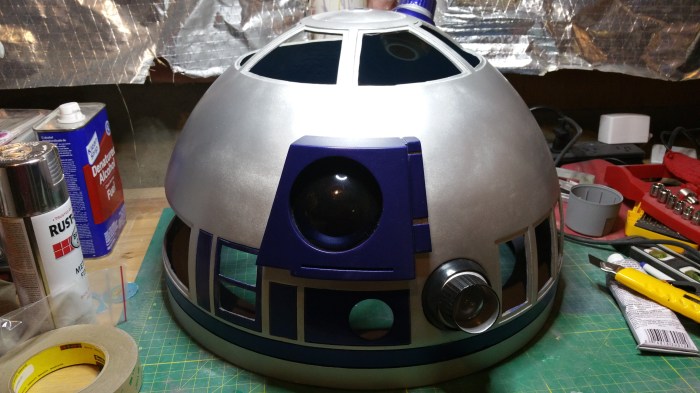
Holoprojector installed.

Looking good from the outside. They just needs one more thing.

Lenses. These are 1 1/2″ acrylic cabochons. Which so happens to fit perfectly inside the holoprojector. As you can see from the last picture of the dome above, there is a little lip around the inside of the lamp shade. This is were the lenses will rest against.
I decided to try the tape first, it being the easiest and cleaner option to glue.

I got the pieces of tape as close as I could, but there were still lines, especially noticeable on the ones were I only use two pieces of tape. I was hoping that the tape would dry clear.

They did not. The lines were still visible the next day, and showed no signs of fading away. I took them out cleaned off the glue residue with some acetone. I carefully applied the glue that I have been using, just to the outside of the lenses were it would rest on the lip. 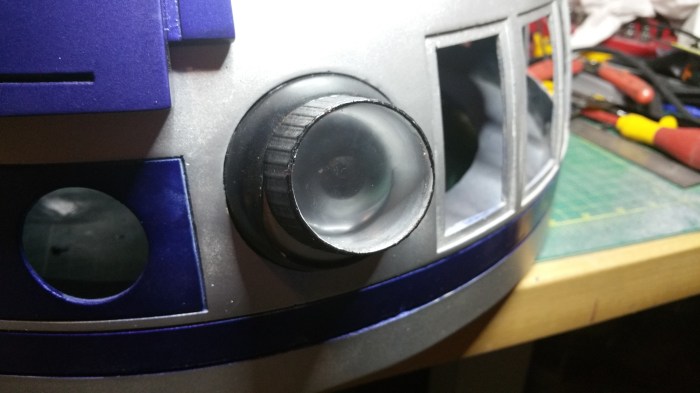
Much better
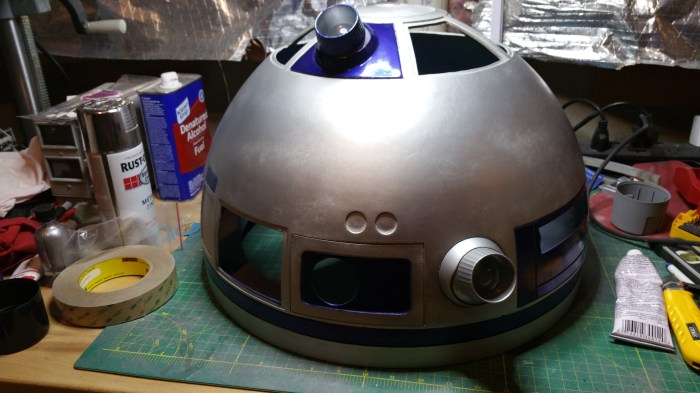
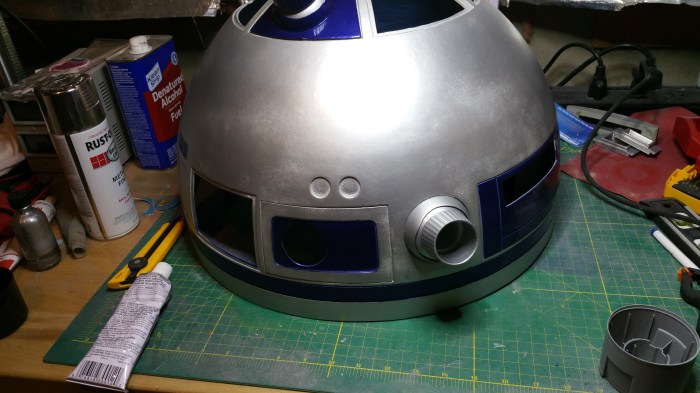
Starting to fill in some of the missing pieces.
I think I hit a bit of a milestone while doing this part. Unless a part gets damaged, I believe I am done with paint on the dome. YEAH!

Whats up next? I have two major sub systems left. The Hinged panels that will open and close electronically, or the lighting system. (The electronic parts that I started this whole project with), plus the lights/servos for the holoprojectors. I am leaning towards the lighting system, but I’m not sure if they will physically get in the way of mounting the hinges and servos I will need for the panels. I don’t think so, so that is what I plan to do as of right now.
